Well, here's another recipe using what are regarded by most as weeds.
Pesto can be made from really anything. We’ve all seen pestos with basil and tomato of course, but they also use other herbs.
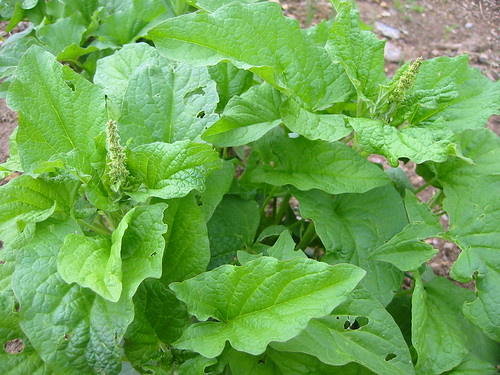
The Italians make this nettle pesto in springtime called pesto d’urtica.
They also make a nettle pasta - Strettine - a springtime favorite in Emilia Romagna, but that's for another day.
There are a lot of recipes for it, but mine was certainly inspired by Hank Shaw fromhonest-food.net
I have not used Irish rapeseed oil before but it is now being produced in Donegal by the Donegal Rapeseed oil company, and it worked great. I think its great that we are now producing a viable alternative for olive oil and really hope they do well. A list of outlets stocking the product can be seen here.
Donegal Rapeseed Oil is also very healthy. It only has 6% saturated fat content where most olive oils have 14% and sunflower oil 10%.
INGREDIENTS 100g fresh nettle leaves, washed in cold water As with nettle soup avoid picking nettles on the roadside as these may have been sprayed with herbicides. Dont forget to retain the nettle stems for the garden.
2 garlic cloves, core removed, finely chopped, or wild garlic if you have it. 50g (about 2 tablespoons) pine nuts, lightly toasted. You can also use cashew, walnut or if you are lucky enough to grow them try hazelnuts. 60g grated hard cheese like Parmesan or even the heel off a good mature cheddar 150ml Donegal rapeseed oil (or substitute good quality extra virgin olive oil)
Salt and fresh ground pepper
Method Remember to wear kitchen gloves. Blanch the nettle leaves in well salted boiling water for a minute or two, this removes the sting and the salt helps retain the colour. Then plunge into iced water, again to retain texture and colour.
Drain and roughly chop, (you can keep the water as stock or for boiling pasta to go with this meal) remove as many stems as possible. Once they are cool, put them in a colander to strain.
Next get a tea towel, and put the nettles in it. Wrap one end of the towel one way, then the other end of the towel the other and squeeze out as much moisture as you can.
Purists say pesto is best made with a mortar and pestle, after all the name comes from pestle, which means to pound. I just use a food processor.
First crush the pine nuts lightly with a knife
Core and roughly chop the garlic.
Add the salt, pepper, cheese and the nettles and commence blitzing.
Start adding the rapeseed oil.
How much you add depends on how you are using your pesto. If you are making a spread as I do then about 100ml. If you plan on using it for pasta sauce, then you will need more.
Either way, you add it in to the blender at a slow steady pour to incorporate it.
I used 100ml in the blender and retained 50ml to cover it in the jar at the end.
I tend to go for a dryer pesto - I figure if I use it in pasta, minestrone or gnocchi, I can just add a little oil in a bowl and thin it out a bit more.
Nettle Pesto is very easy to make, can be stored by freezing or waterbathing. Pesto will keep for up to a month in well sealed jar in the fridge.
It really is great simply put on soda bread, with a little cheese and some spicy radishes for a little extra kick.
The colour is vivid and fresh looking, with a mild and subtle flavour. Compared to even good quality basil pesto the flavour and colour of home made is far superior.
Well, thats another mostly free food - and soooo easy to make. As always, please do take the time to comment, I love the feedback
Grandad's 1941 Dept of Ag leaflet's - cost 2s 6d ! Solid advice to kitchen gardners, still valid and helping the family 70 years later. Thats value.
Sea Kale is a perennial green, hardy and reliable once established, and that's the trick.
My initial batch had a very poor germination rate,this is because the seed is contained in a cork like husk that allows the plant to propagate with the tides in nature.
After some research I found that removing the outer seed casing help's and speed's up germination.
Put the seeds in a bowl of water for a few days,then using a very sharp knife, like a craft knife or scalpel, very carefully and gently take off the outer husk. It's a little like a tiny avocado
Seakale seed, de-husked and ready for pots
Apparently germination usually takes place in 3 to 5 weeks at 15°c but -as I found -can be slow and irregular.
I have already planted out 4, 3 failed but the fourth is doing well under a cloche for now.
As the plant is perennial, and lasts many years, the main aim I have in the first year is to establish at least four plants to make a start.
Paper pots ready to take seed
A new tool I got myself this year came in handy. From Seedaholic in Mayo I got a Nether Wallop paper potter.
Now, I have made my own in the past, but that was all flour glue and lacked uniformity.
The paper potter saves time and bother, recycles newspapers and gives good, uniform starter pots.
It's a very simple, clever and cute addiion to the seed box.
The pots will not disintegrate until planted, even if soaking because their walls are several layers thick so will only bio-degrade after they are put into the ground.
Using the system means there is no root disturbance or damage because the paper pot goes straight in the ground will rot down and the roots will grow through it.
It also looks and feels good and could not be simpler to use. It's a once off investment and well worth it.
As for the seakale, I really look forward to getting it established and growing well, with a bit of luck.
The Fresh, creamy-white stalks of sea kale are a seasonal delicacy at the deadest time of year.
They were harvested from sandy beaches in Victorian times when it was a popular vegetable.
Collectors covered the stalks with sand to keep out the light and develop a delicate flavour.
But over time, wild supplies became so over picked and endangered that it was made illegal to harvest from the beach.
Seakale can be forced like chicory or endive to maintain delicacy to a similar height to rhubarb.
Unlike rhubarb, the frill of leaves at the top can also be eaten.
It can be eaten raw or cooked with melted butter. The Victorians cooked it with a white sauce and served kind of like asparagus. So here's hoping this batch will do better!
Asparagus, quite an expensive food in shops is easily available from your garden once it is established. Asparagus is a native to coastal regions, so with a bit of care it should do well here.
It's a perennial crop, so will keep producing year after year.
I decided to grow from crowns as opposed to seeds in order to be more sure of establishing the crop.
Bed preparation was straight forward, but I put a fair bit of work into it.
As with the Jerusalem Artichoke I dug down to base rock in the bed.
I pulled the stones from the dig and dumped them at the bottom of the trench to create drainage and a base.
After that I heaped in about two whellbarrows of seaweed and another of well rotted manure - this is a permanent bed, so I went to town on it.
As asparagus is a coastal plant, I feel the seaweed will give it the best nutrition and environment as well as deter slugs underground.
Over that I used chicken wire nailed to the sides of the bed to create a sieve (I think it is referred to as a soil riddle normally) for the soil, breaking it up and removing stones, weeds and lumps of last years turned in grass that had not broken down.
Removing this materiel also let me find cutworms, leather jackets and other nasties that were quickly dispatched to the big weed patch in the sky.
The asparagus patch was separated from the rest of the bed by an old limestone kerb.
The plot itself is lower than the rest of the bed, this is important as the asparagus patch needs to be built up year after year to continue cropping.
It also creates a barrier, obviously the idea is the asparagus spreads its roots around in the plot, expanding and growing within its own soft earth 'box'.
Also, having the different, stepped level I have the option of covering the space with a sheet of transparent corrugated plastic, this will improve the temperature in the plot.
I am growing two types, both purchased from Mr Middletons in Dublin, the idea being variety and different cropping times to extend the production period.
This blog is independent, no sponsors so no vested opinions. In all fairness having previously recommended Mr Middletons postal service I'm afraid I can no longer do so, but more about that later.
One was Connovors Colossal, holder of the RHS award of merit for an outstanding variety and Mr Middleton Gold Medal Winners Bloom 2009/2010. 6 crowns cost €8.99 EUR
The other was Pacific Purple. Advertised as more tender and sweet than many green varieties.
The spears are basically stringless and can be eaten raw, with dips, or sliced in salads.
Colour is lost if cooked so is best steamed. Produces supersweet white spears if earthed up.
4 crowns cost €8.99 EUR
This year I am trying to do as much companion or complimentary planting as possible, every bit helps in the fight against pests and plagues.
Parsley is a companion to asparagus and tomato because it deters asparagus beetles as well as carrot flies and rose beetles. It is also said to improve growth.
The Parsley plants were last years plants starting to grow again, so I simply transplanted them into the asparagus plot up against the limestone to give it a bit more heat, this I hope will help it establish and flourish .
I may also plant a few Atika - root parsley seeds there when the weather gets a little better.
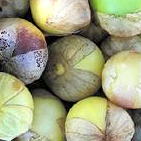
Because of the parsley as a companion crop and the transparent plastic cover option I think I will also try growing tomatillo in the plot. The seeds are en-route from realseeds.co.uk.
A relative of the tomato these small vegetables in a papery husk are related to the tomato, are very productive and easy to grow, used to make salsas, chutneys and in pasta sauces etc, as well as traditional ingredients for Mexican and South American dishes. Tomatillos, referred to as green tomato (tomate verde) are a staple in Mexican cuisine.
The bed itself is in quite a warm, sheltered spot so as a catch crop I also threw in a few strawberry plants picked up as a compulsive buy at Aldi in Clifden.
Mr Middleton problems.
Having recommended Mr Middletons postal service in the past I'm afraid I can no longer do so.
This year, the delays by Mr.Middletons were a problem, as was the very poor communication. I was very dissappointed by the very, very poor customer service.
I cancelled my postal order and the crowns were purchased by a mate in Dublin for me at Mr Middleton's direct.
The attempt to buy them online dragged out, a lot of hassle with no apologies and little explaination.
On the 11th of January I ordered Jerusalem Artichoke and Asparagus crowns from them, as advertised in the Irish times. It was the first time I had spare cash in some time so it was a real treat.
After ordering, and getting confirmation, I got an email saying that there might be a small delay in deliveries.
Over a week later I emailed asking for an update, again, the reply was that they were awaiting delivery with the Artichoke and I should have them within a week - that was about the 19th of Jan.
Roll on Feb 15th - and a phone call asking for card details. I had assumed that payment had been taken in January - but no, and in the meantime I had changed my card.
So I'm a little fed up being messed about, particularly after having been a loyal customer.
If I could have sourced the asparagus crowns elsewhere I would have, as I did with the Jerusalem Artichoke.
The least they could have done was send on the crowns, and send on the tubers at a later date rather than leave me incommunicado for nearly a month.
Anyway, as the old saying goes - buyer beware, and I am sure there are crowns in local garden centres.
Well, just made a start on growing, its that time of the year. It's always great to be able to expand in term of crop types and bed's, but it also takes planning and work.
This is particularly true when working on poor, marginal land like we have in Connemara, its pretty unforgiving.
But I have found some fantastic tool's available in Mayo and elsewhere in the country. Chillington Hoes- I really don't know how these are not more widely used in Ireland, but they are available now - a list of stockists can be seen at this link.
I decided to convert last years auxiliary potato ridge into a bed for two permacrops - Jerusalem Artichoke and Sea Kale.
This was tricky as I would have to terrace in a bed. I really felt this could even require the hire of a mini digger, but at gardenplansireland.com I saw an advert for the Chillington's, so I made contact with Nigel and picked them up.
After a brief try with it, I knew the tool would save me time, effort and money - that easy.
The whole process to clear tangled ground, clear rocks, open new ground, fertilise, plant, cover and bank up took me about 3 hours, and with a shovel, spade and pick I think it would have taken at least a days work.
I got to say, for a kitchen garden, particularly here in the west, this has become an invaluable tool.
So, the setup was at the edge of the garden to terrace in a new permacrop - Jerusalem Artichoke being the main one.
Firstly I had to open up the trench, which was under heavy, tangled grass and weeds.
The heavy duty ho took care of this with little effort, despite the stones and rocks. In the picture below it gives you an idea of how much stone comes out of a small trench.
Note the amount of stone on left.
The next step was to lay a bed of permanent nutrients beneath the new crop.
This was made up using seaweed and well rotted manure
After that I laid in the chitted tubers onto the bed seaweed and manure in a herring bone or zig zag pattern.
Next step was obviously to get the soil cove on, again done very quickly with the heavy duty hoe.
I used the larger rocks to shoe up the sides of the bed, and it also will allow me to terrace out the next level should I wish.
Pushing the bed out, again using the heavy duty hoe I edged the bed and put down some Sea Kale plants I had germinated.
Then it was simply to revert to what I know, laying down a pathway of ash and pine needles over the smaller stones taken from the rocky soil.
As I said last year, the building of the pathway using stone clears the soil and provides a great base.
As the pine needles and ash dry out, it becomes an unpleasant environment for slugs and suppresses weeds.
The concept behind the bed itself is straight forward, but the execution - e.g. digging into a rocky incline was always a bit offputting. However, must say that I found the Chillington heavy duty hoe to make the job remarkably quick.
It also allowed me to start to make a start on opening up two new beds that are on ground with lot of large roots, this has also been remarkably quick compared to the usual spade work.
Well, the more I learn about gardening and plants, the more ideas I get. For people with limited space, or with just a flower garden a few of these plants may be of interest.
They provide food, and also garden colour - so well worth a look.
I will update this posting with my own pictures etc. as and when I get them, the pics shown are generic from searches.
This year I transplanted my horseradish and put rhubarb crowns in their permanent positions. With some great advice from gardenplansireland.com I decided to dedicate one bed to perennial crops.
It means I will need to create a new one for rotation, but I have the space.
The sea kale is called Lily White. It has distinctive grey/blue green fleshy leaves that give a display of pure white flowers in late spring. It is a protected plant now in many places.
As a food crop it is the early shoots (like asparagus) that are eaten raw or cooked.
They are best when blanched so put a thick layer of straw over them in autumn/winter.
Don’t start cropping until the second year.
Salsify is a root vegetable that goes back to the middle ages. I do know it is not the easiest veg to prep, I believe the Dutch call it screaming housemaid!! It is very old, having been mentioned by Plinny the Elder.
Pulled in winter it has long tapering roots with a distinct flavour – some say oyster-like
As with the sea kale the flower is also good for ornamental gardener’s as all summer long they bloom with large brilliant purple daisy-like flowers
I am delighted to say they also have, again, tipperary turnip in stock. This was a massive success in last years garden as it was very hardy, gave a high return and some great meals.
The other main source of perennial food crops has been seedaholic's in Mayo.
The perennials I ordered from them were mainly herbs, but I also got three perennial veg.
One close relative of the globe artichoke is Cardoon which is popular in France, Spain and Italy.
I got Good King Henry from them. Also known as Lincolnshire Spinach. It promises to be a very versitile plant.
The young leaves and flowering stems can be either eaten in salads or cooked like spinach.
The seed can be ground and mixed with flour then used in making bread.
Known as 'poor man's asparagus', the growing shoots can be tie together in bundles, cooked and eaten like asparagus. Young flower buds can be sautéed in butter
I also got a Sorrel from them - “De Belleville” French or Garden Sorrel
Its meant to be very easy to grow, producing clumps of pale green leaves with a good lemon flavour.
I am told that once you've got a clump going it needs no attention other than when you want to eat it
Sorrel is a ‘herb-vegetable’ or ‘pot-herb’ as it can be cooked like a vegetable.
It can be harvested at baby leaf stage and is great in salads and sandwiches as it doesn't go limp but is most delicious when cooked
From Mr Middletons in Dublin I ordered two other perennials.
Jeruselem Artichoke tubers, they seem a lot less hassle than the globe version.
They also had Aparagus crowns in stock. I got Connovars Colossal as it had 6 crowns - easier to grow than from seed.
So, the plan is that this bed will be very low maintainence, and with any luck - permanently productive.